I wanted to install 12V (cigarette lighter) socket into my new Ninja 650 motorbike. I couldn't believe Kawasaki price - almost 130USD (!!!) for the socket itself. Installation fee is counted separately.
Insane? Definitely.
Doing it myself, I have installed "native", double USB socket with a bit of patience and less than $5.
I went to my favourite Chinese portal and bought this one for $4.24 including shipping. By the way, I mentioned patience before, cause it takes a bit to ship from China.
Installation is almost as easy as connecting the cables. They are already prepared and routed, but let's start from the beginning.
Step 1:
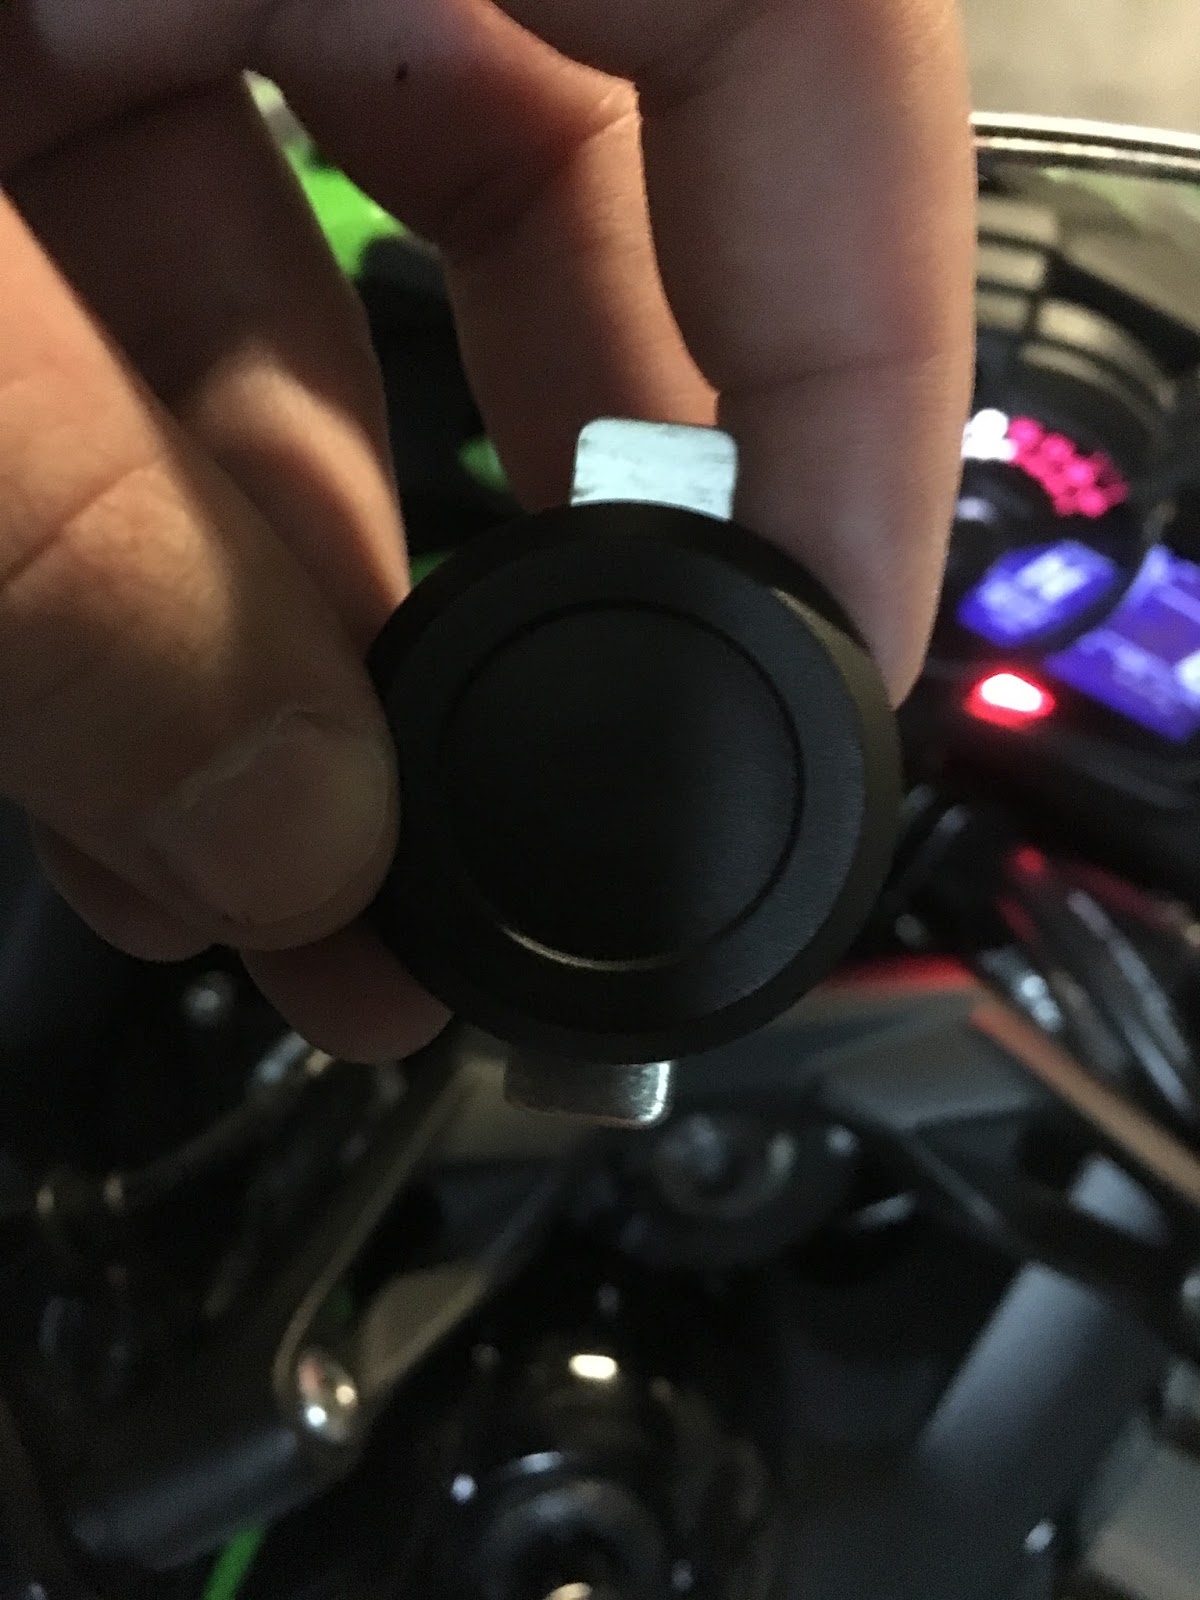
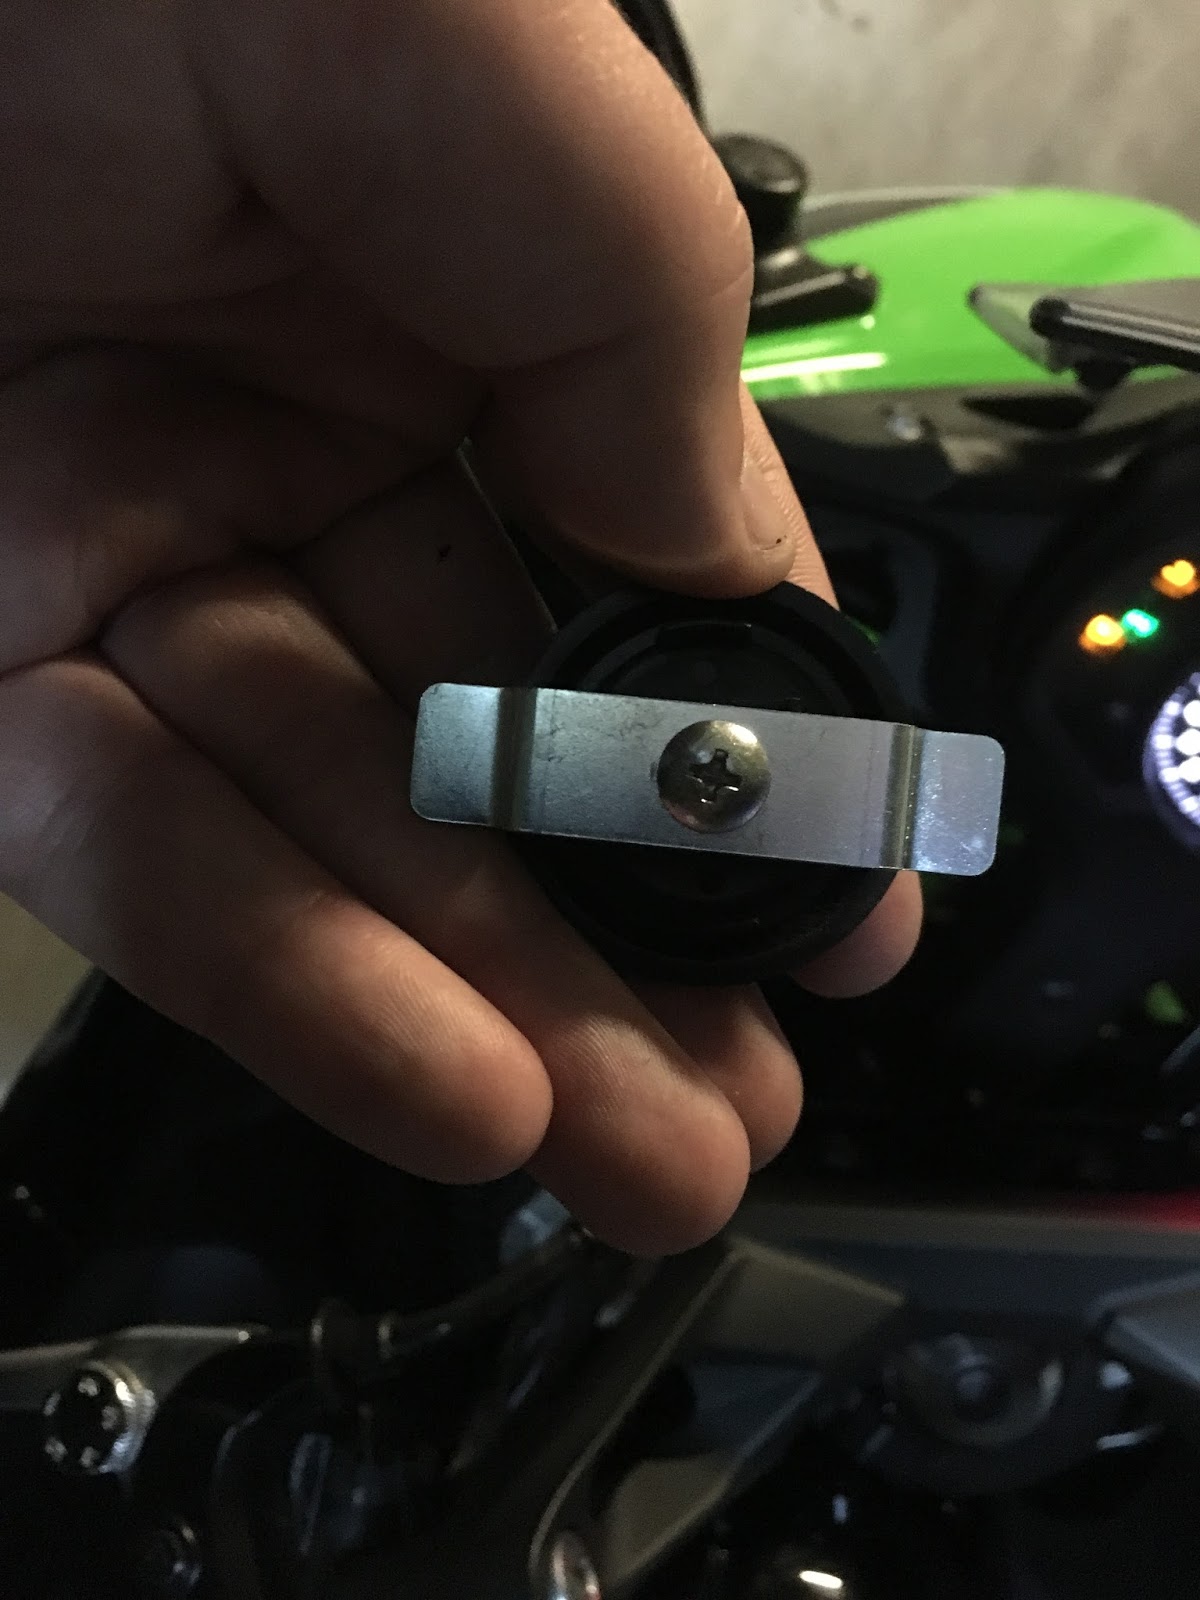
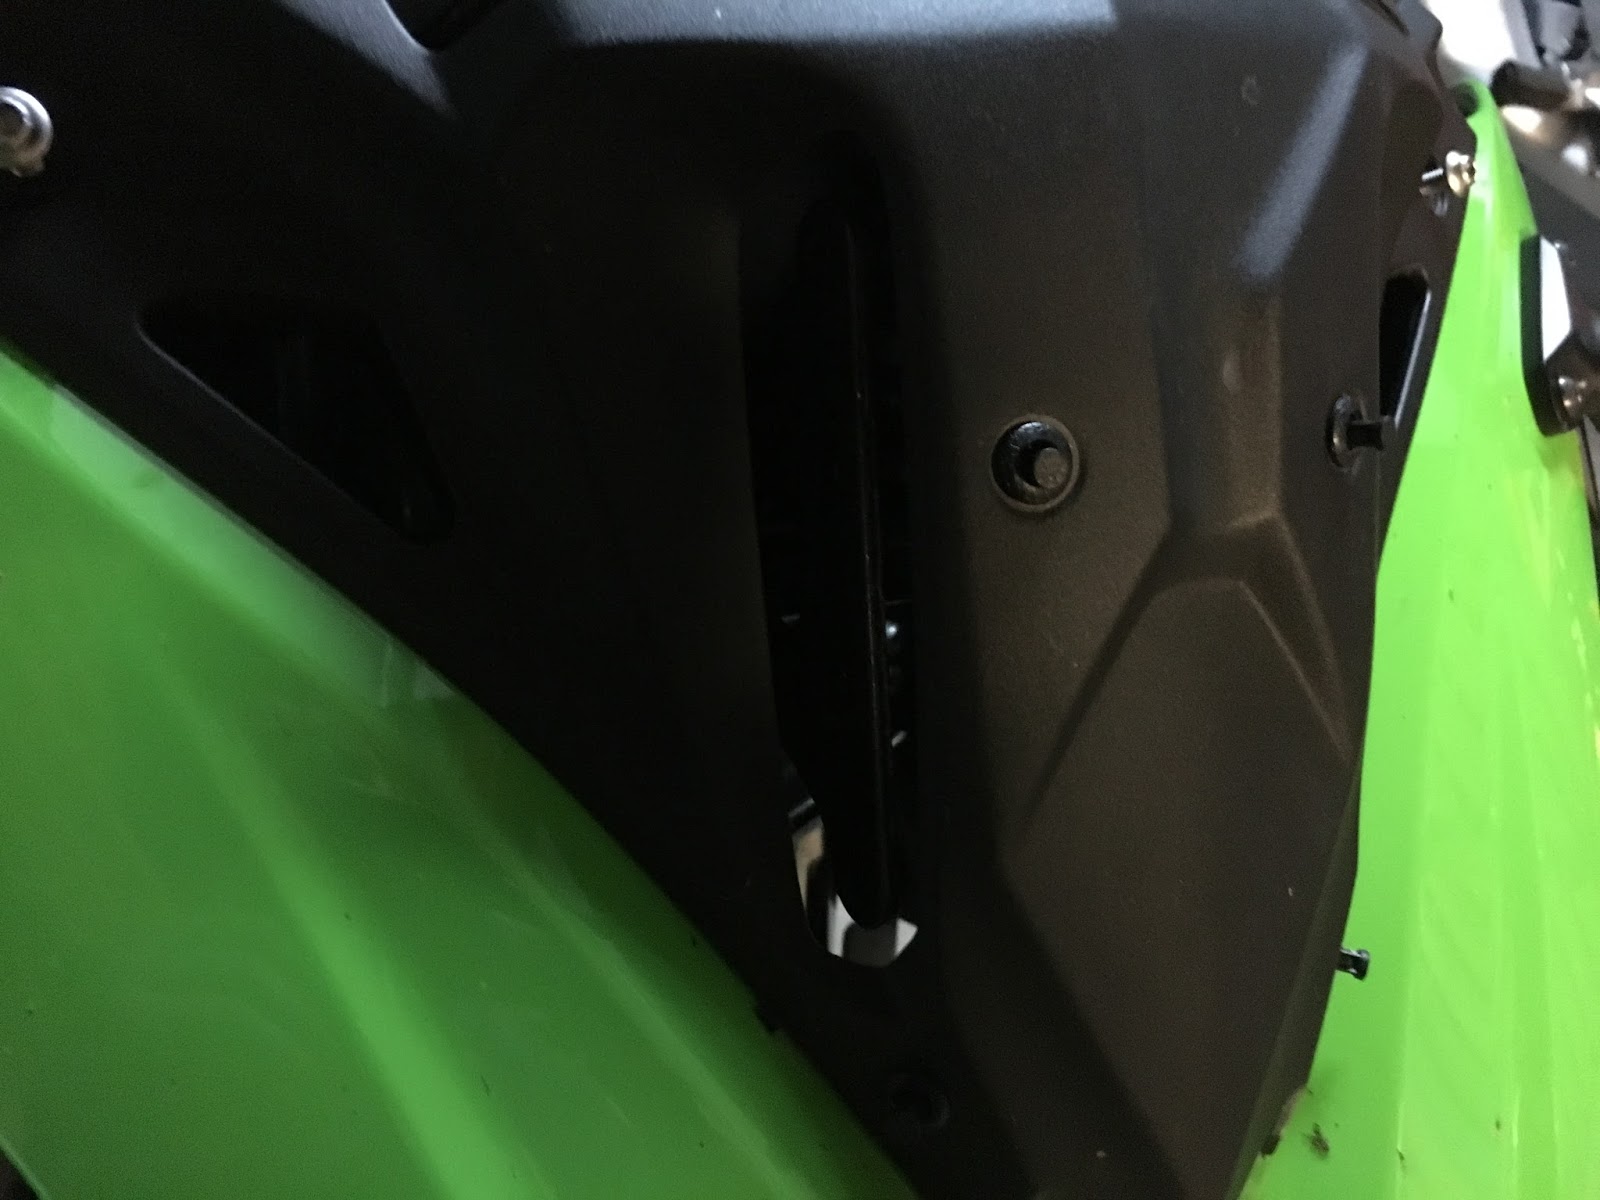
Remove 12V Socket plug from the dashboard. It's secured by one screw from the bottom so it's a bit inconvenient, but with medium screwdriver it can be done without removing any other part of bike:
Step 2:
Remove windscreen. In my case it was easier then usual because I already moved it to middle position. I managed to remove it together with mounting rails:
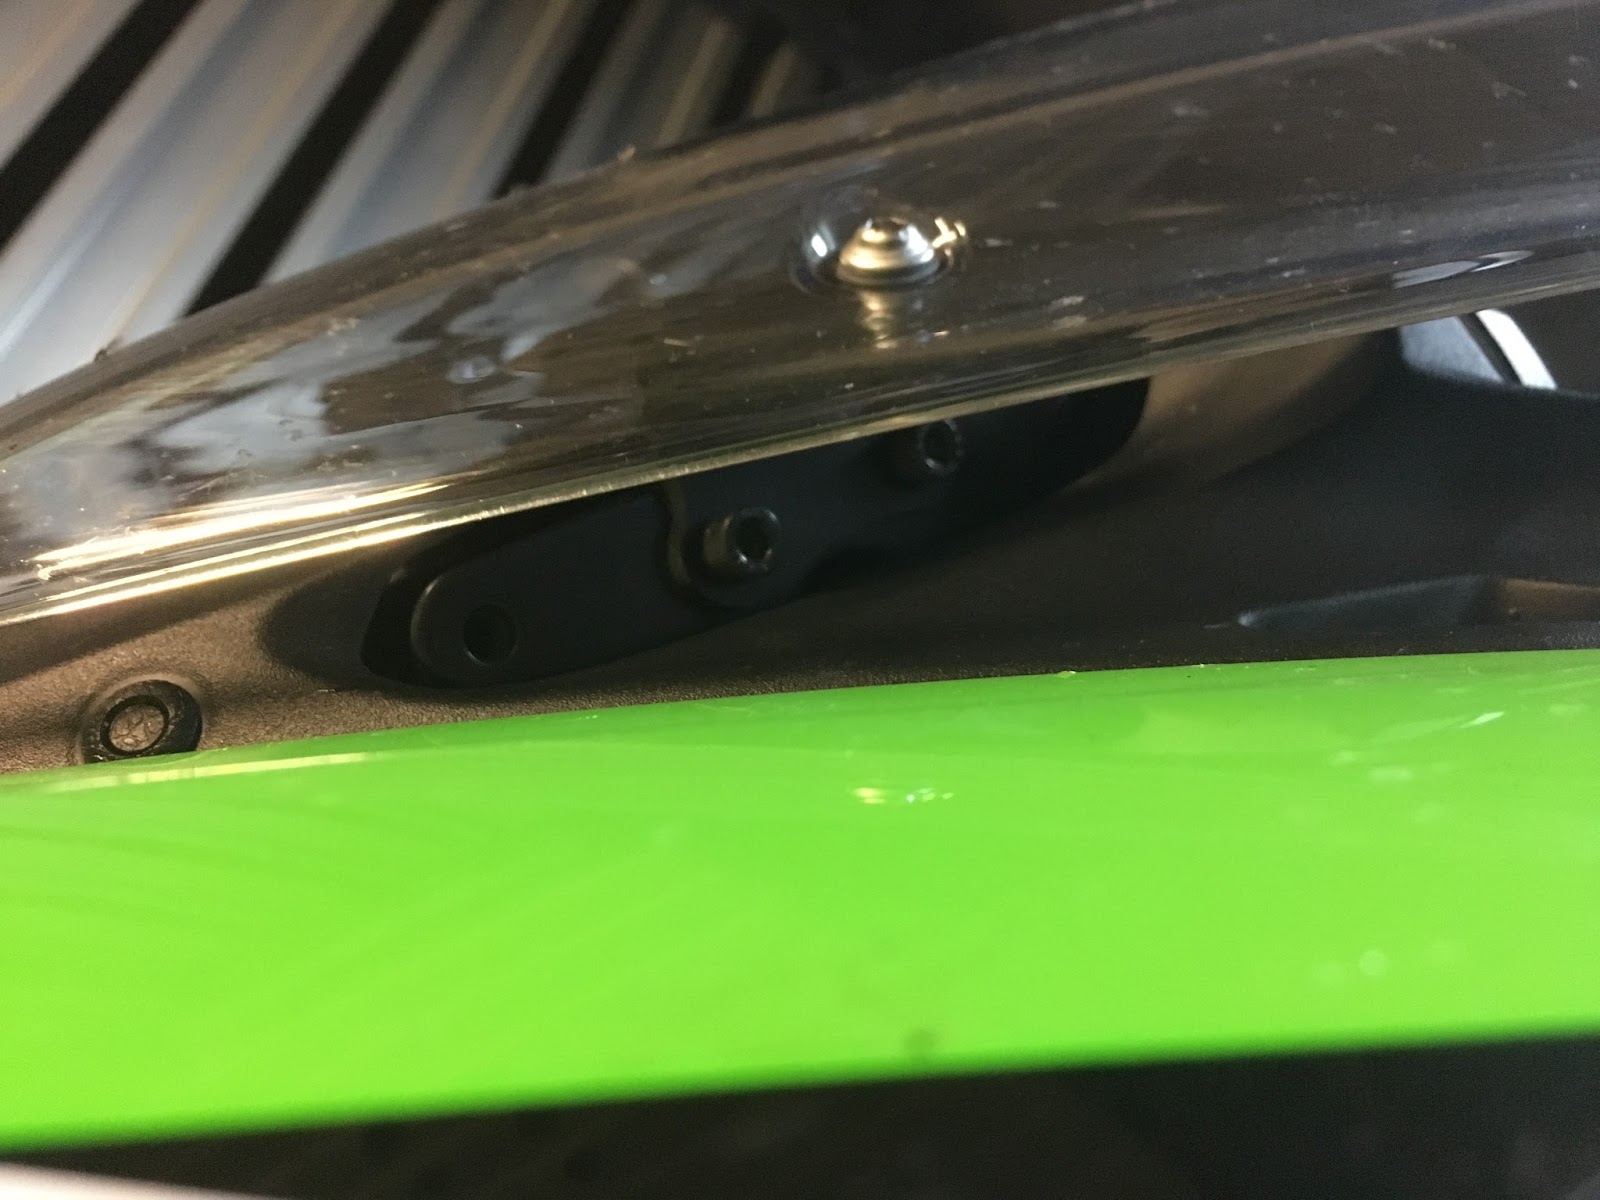
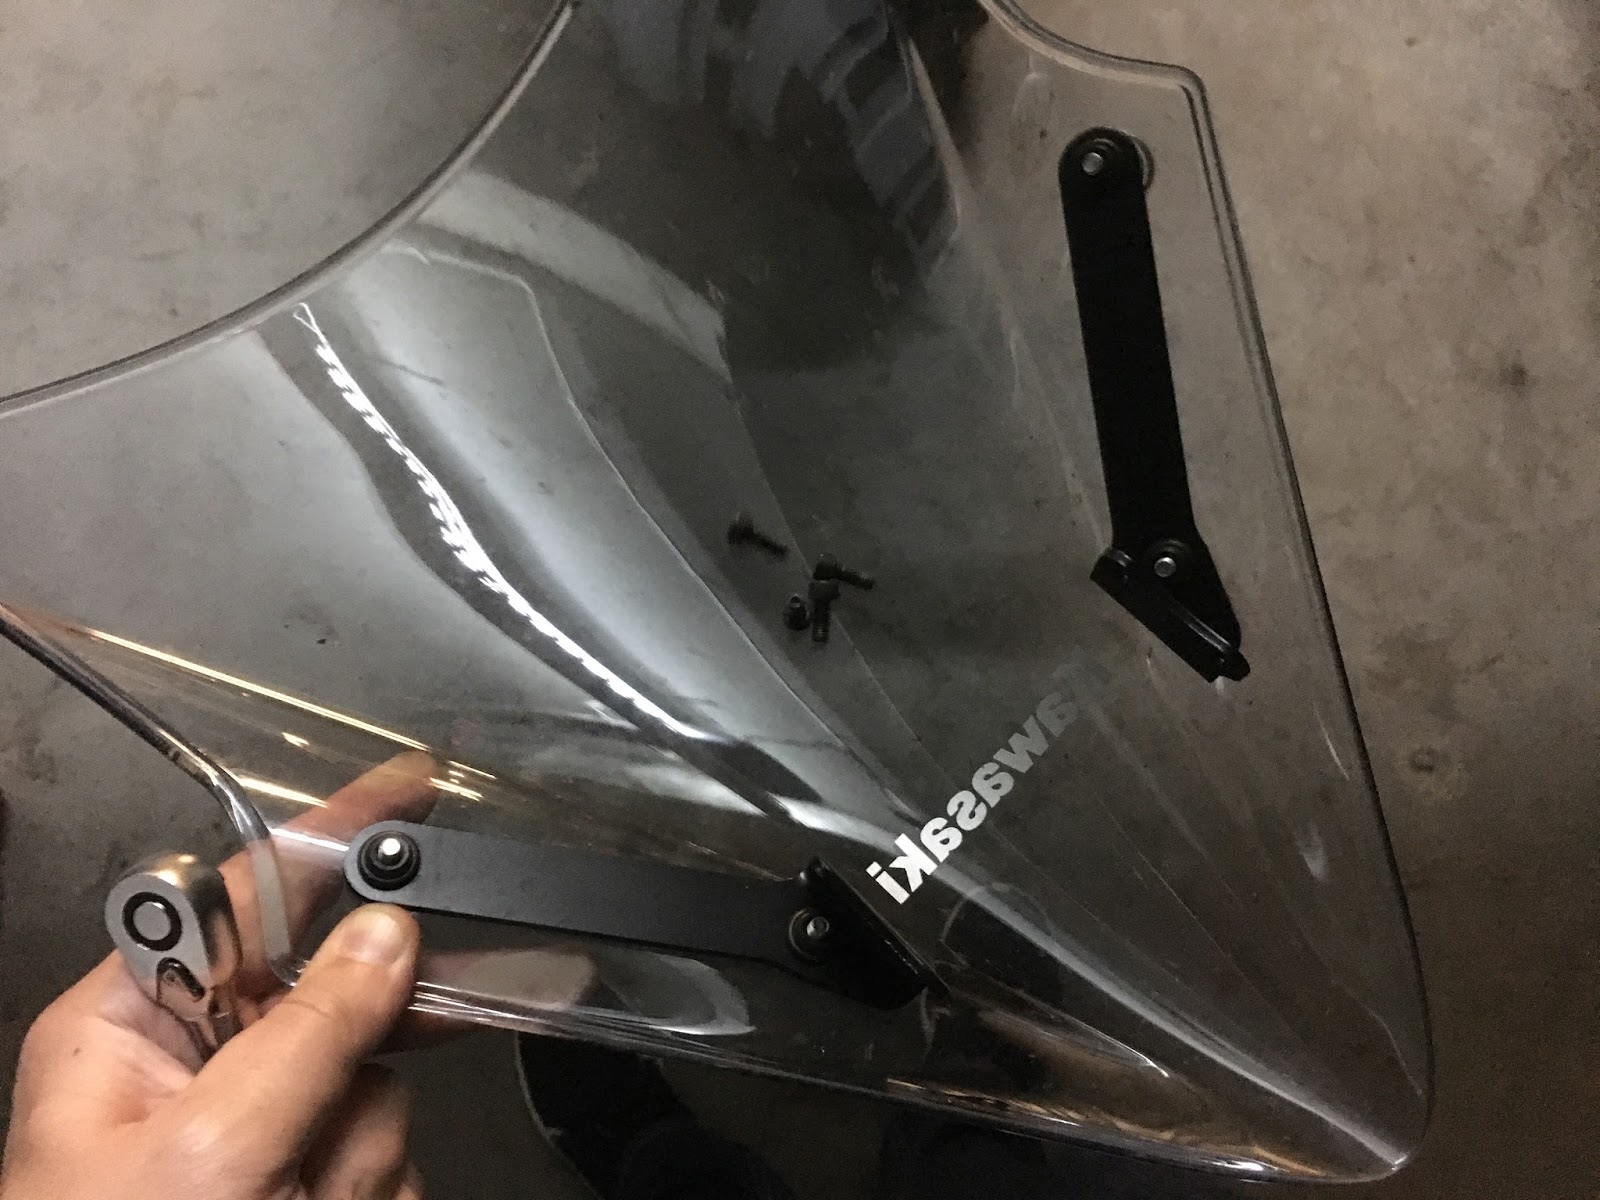
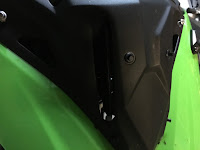
Step 3:
Remove front black panel by pushing center of 4 clips and removing two screws:


Step 4:
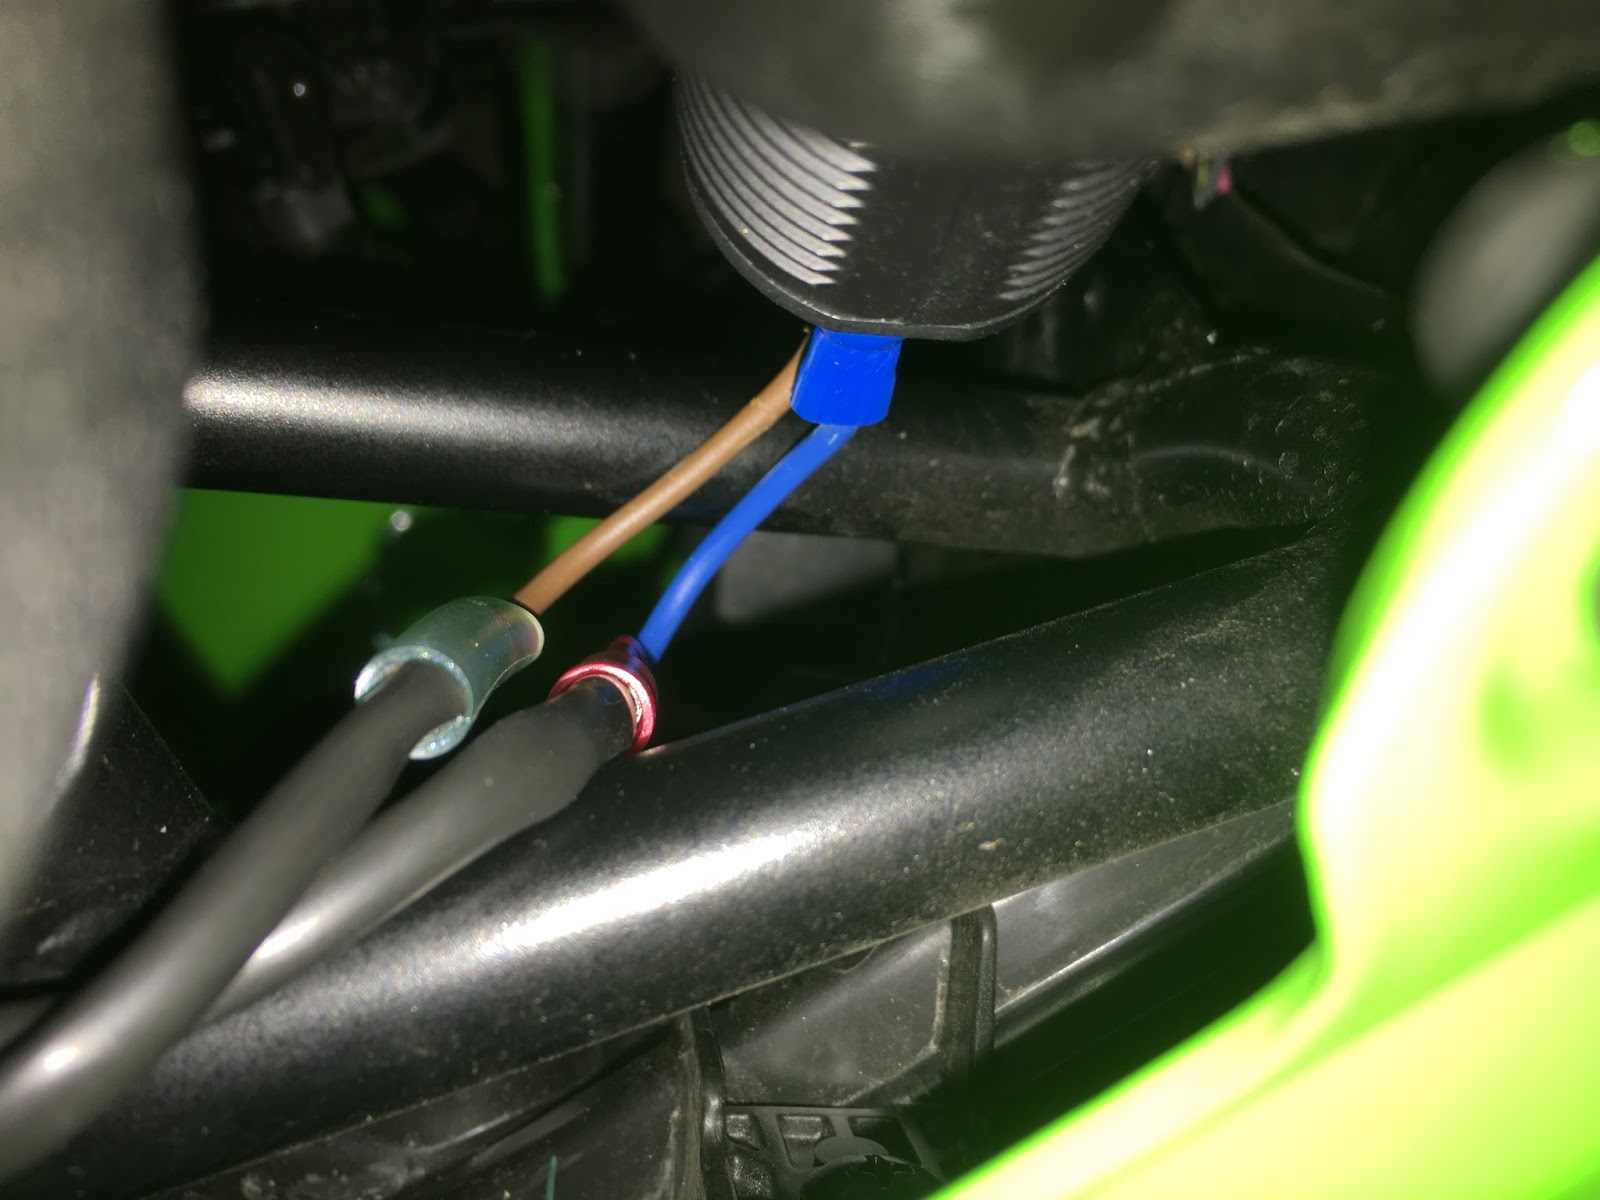
Now the front of your motorcycle should look like this:
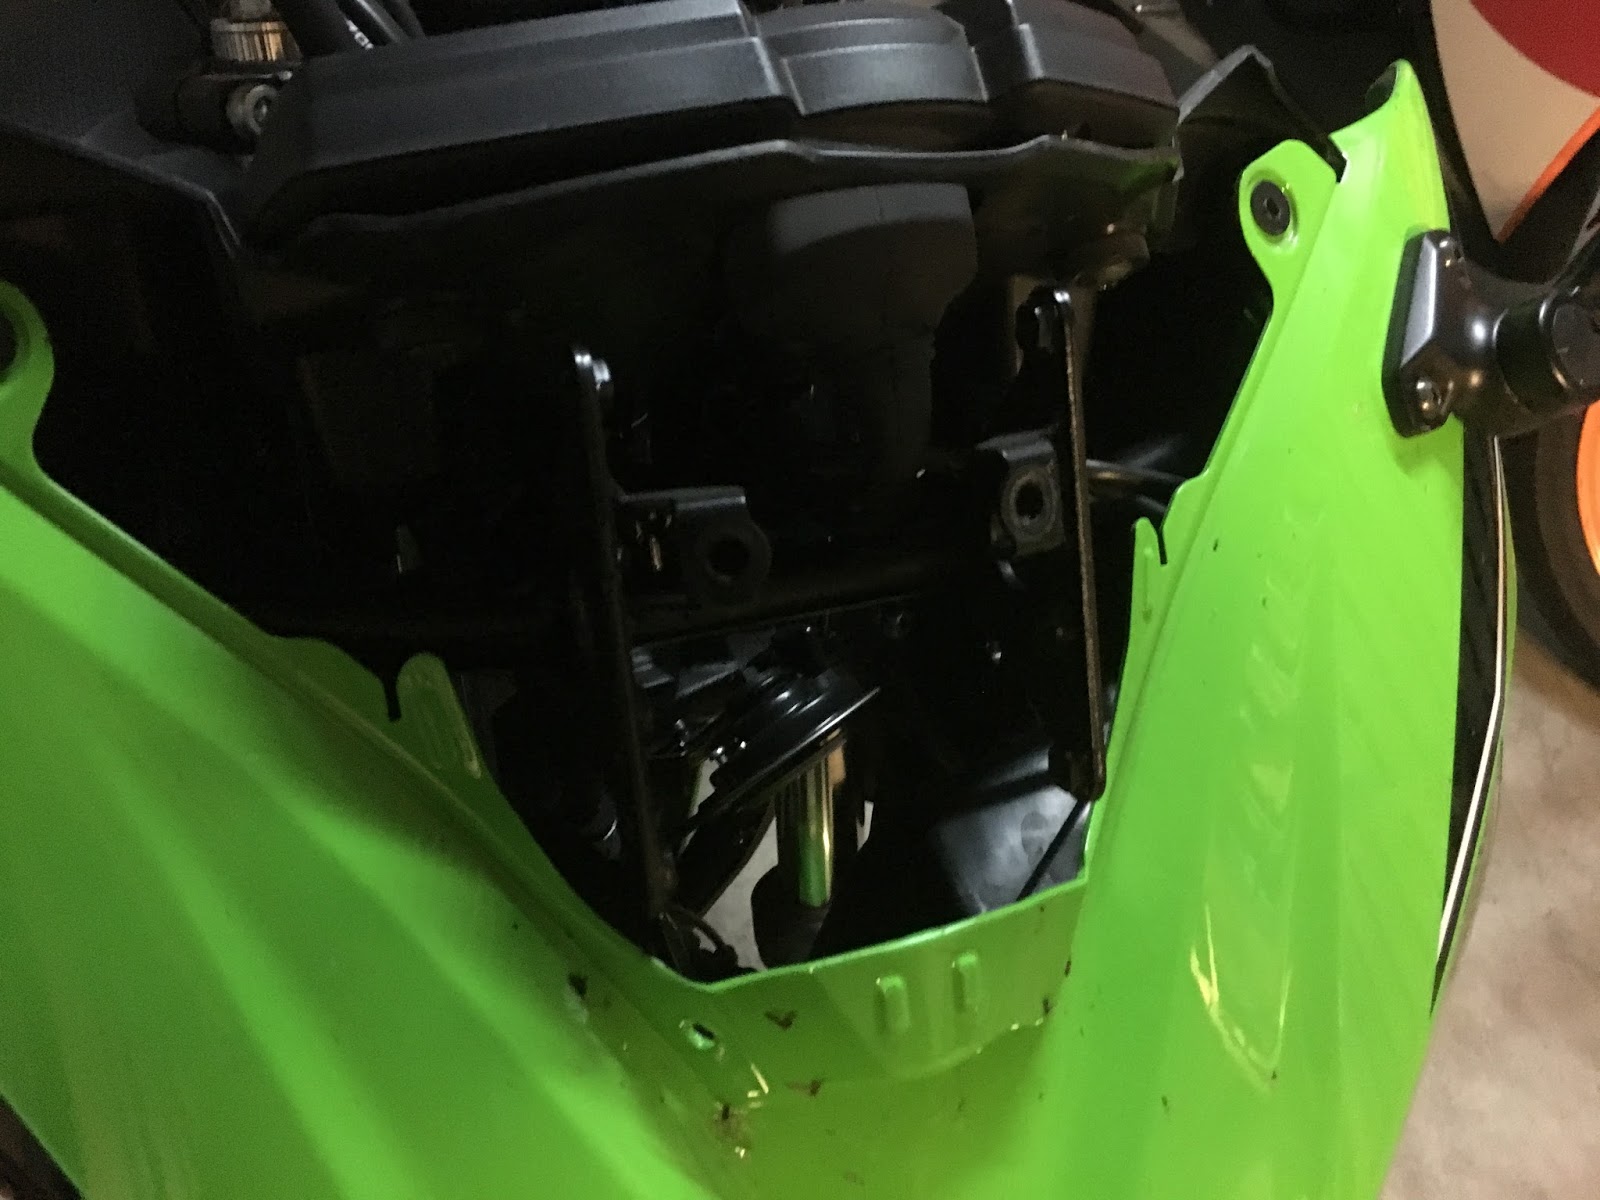
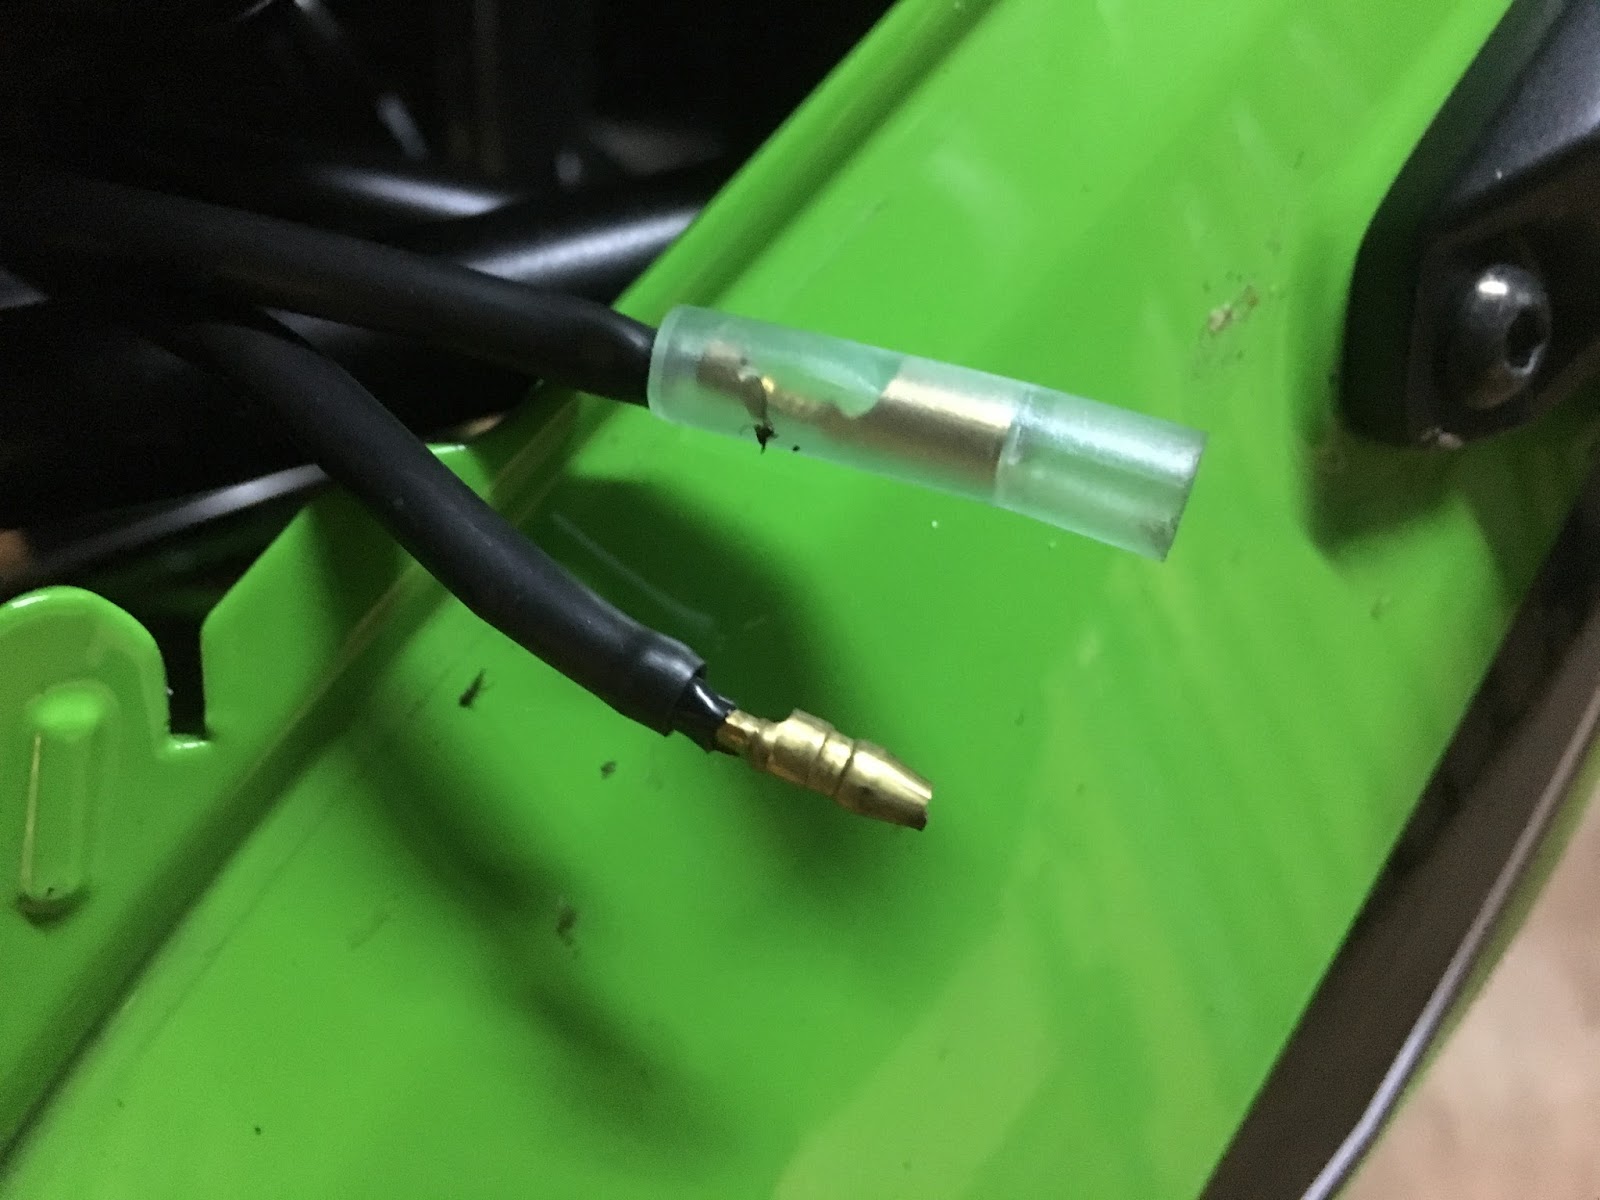
Look inside nearby socket hole and find two cables:
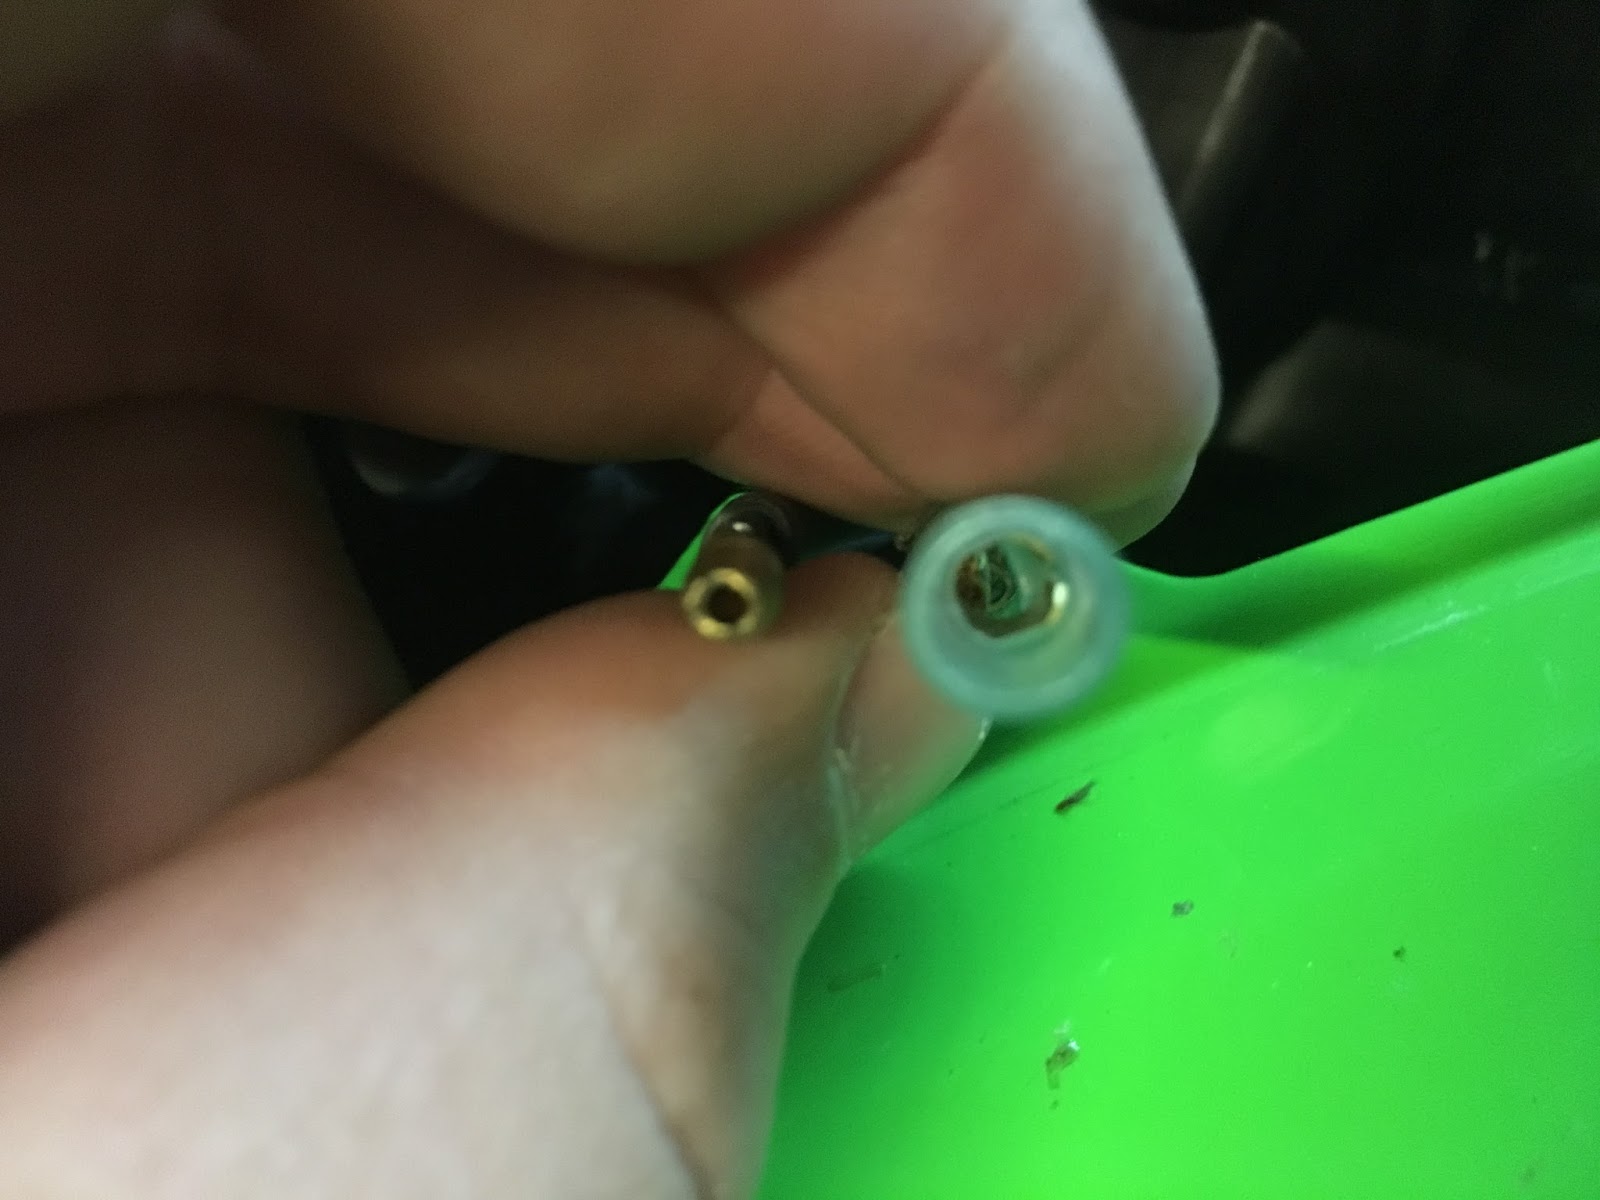
Step 5:
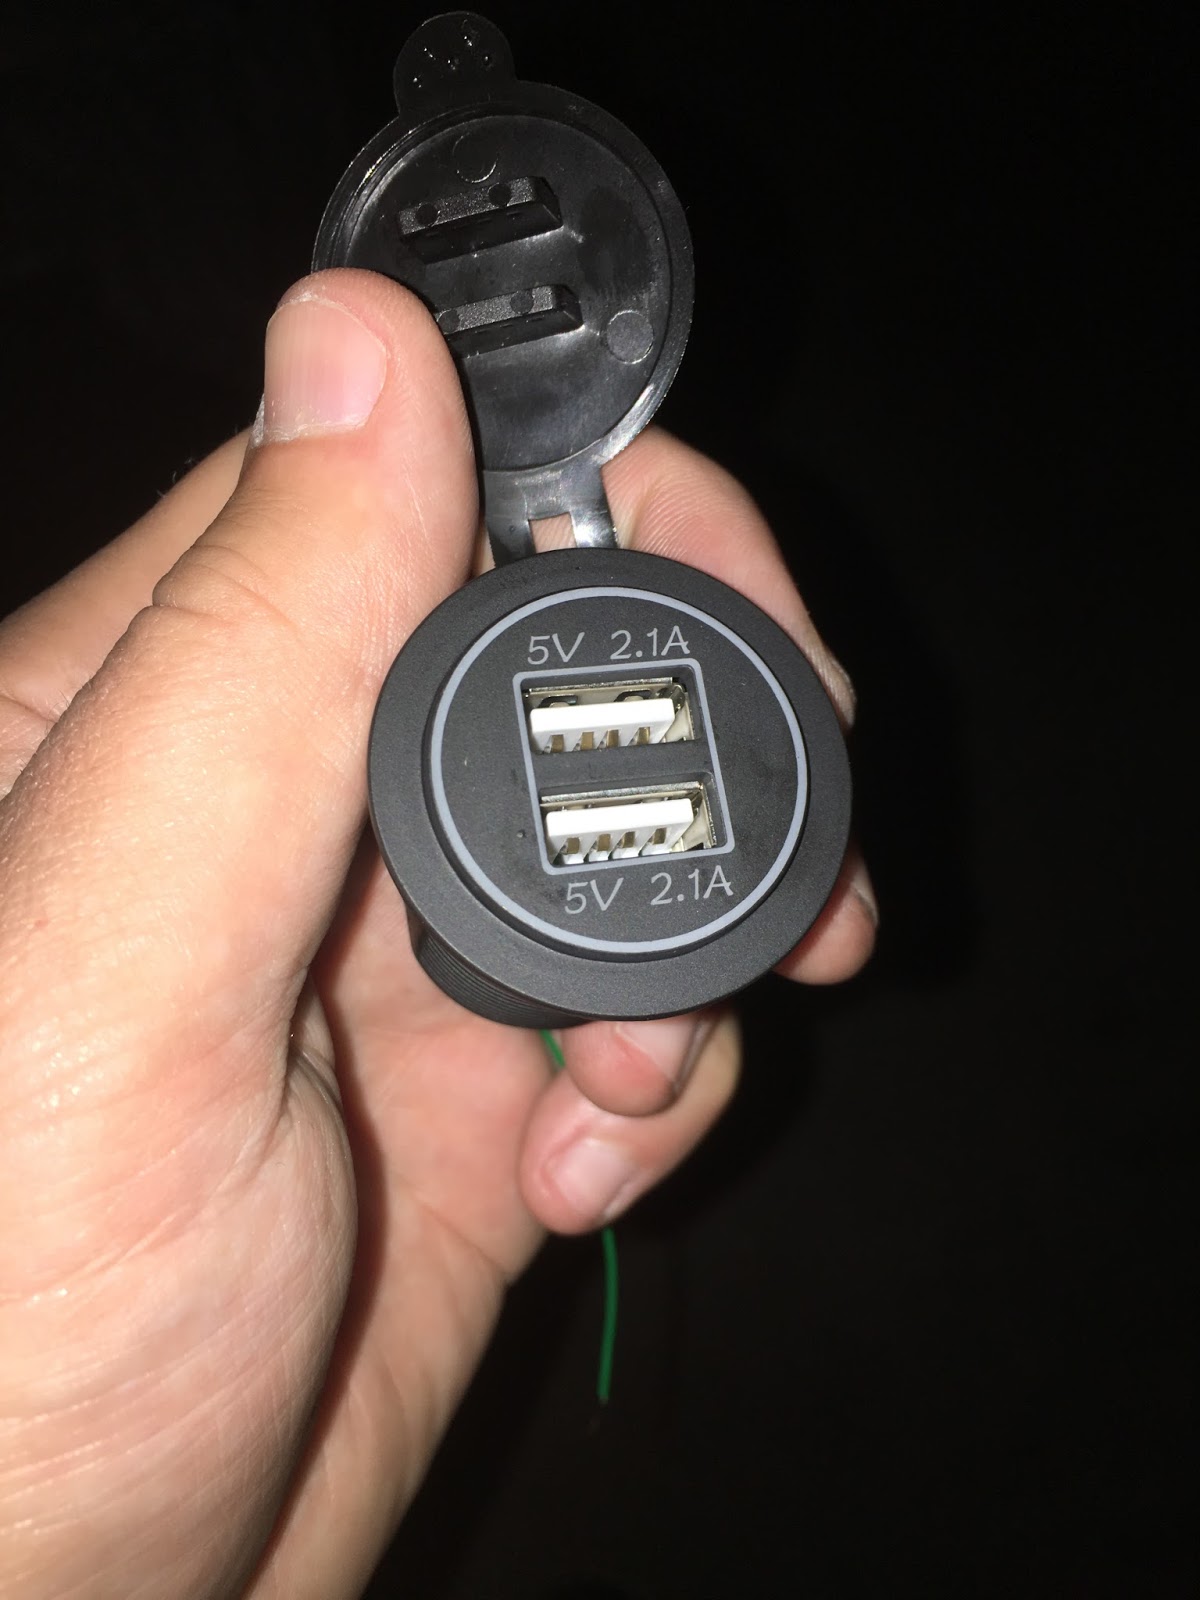
The most difficult part, prepare adapter cables. Required in my case because my usb socket has flat connectors. There were 2 flat connectors already included with my Socket, I had to buy two round (4mm) connectors for less then $0.10 total - you can find them in nearby electric store. 5cm of cable which I already had, stripped from isolation on both ends, squeezed as hard as I could into connectors:
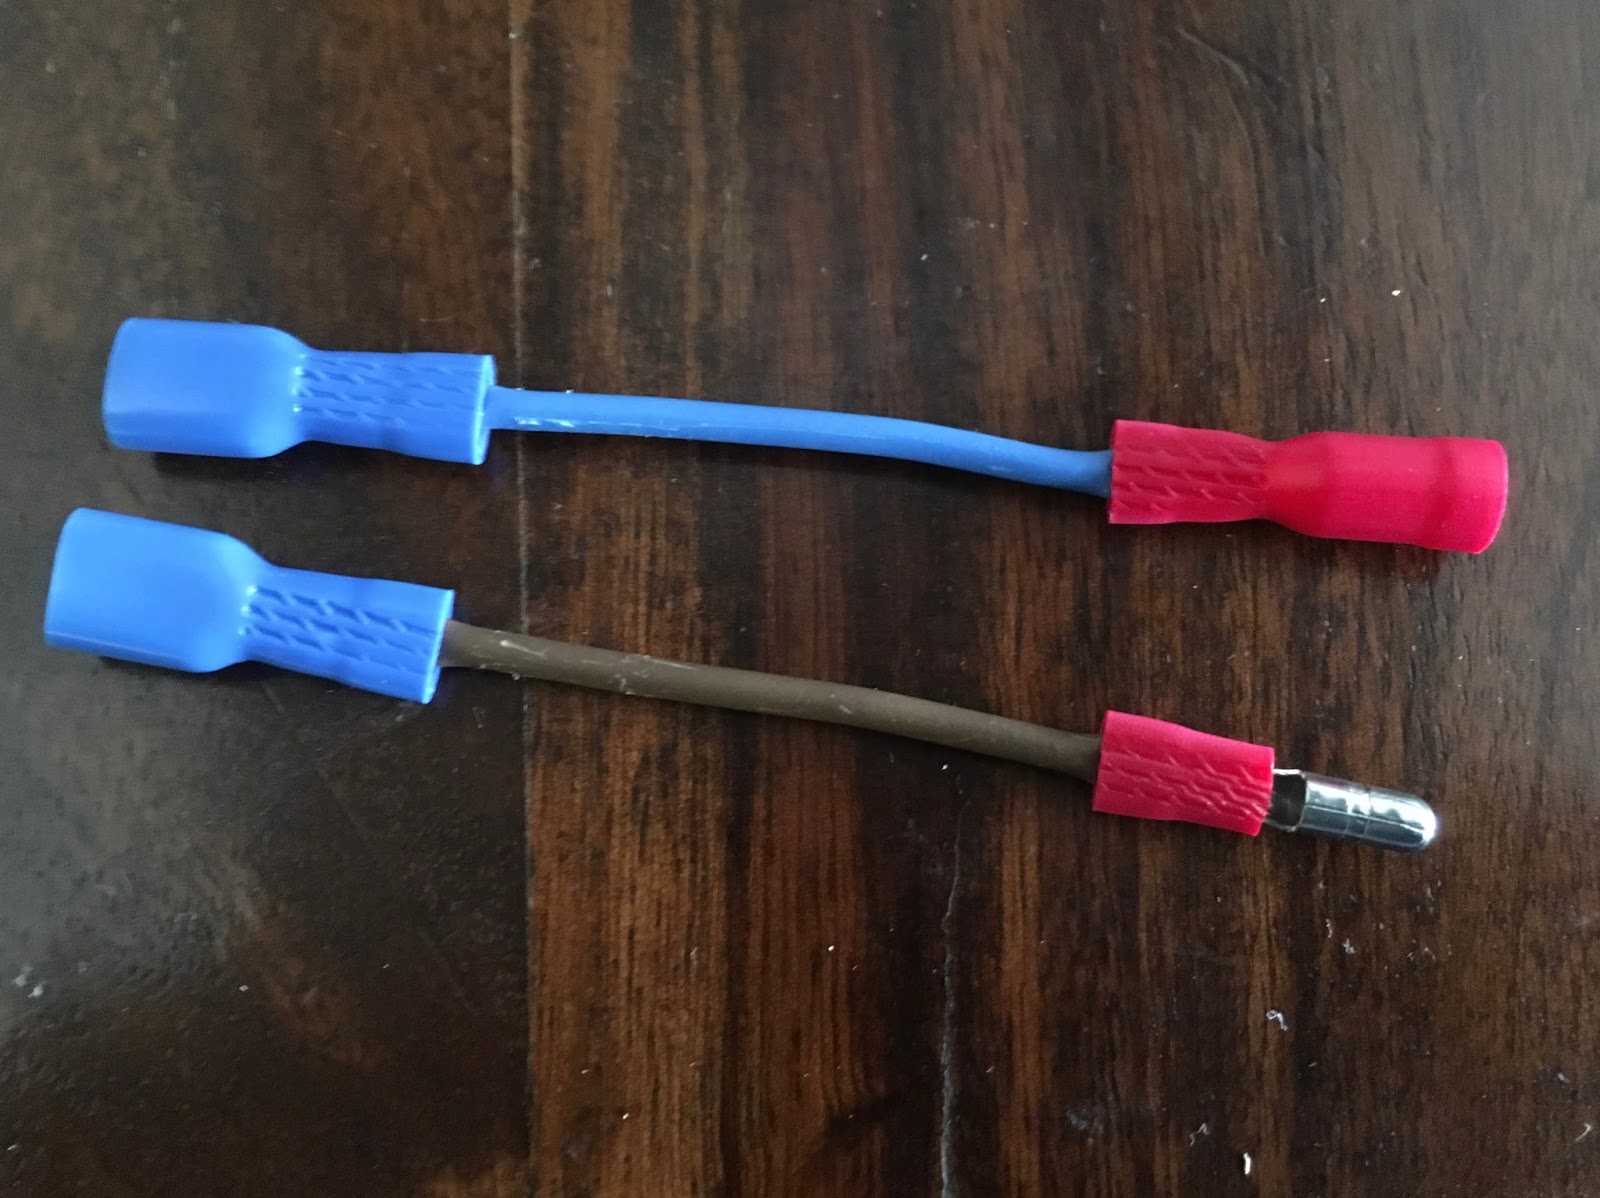
Almost ready to connect, one more thing - polarity is important, connecting improperly may cause damage. Verified with multimeter, female connector is positive (+) and male connector is ground (-)
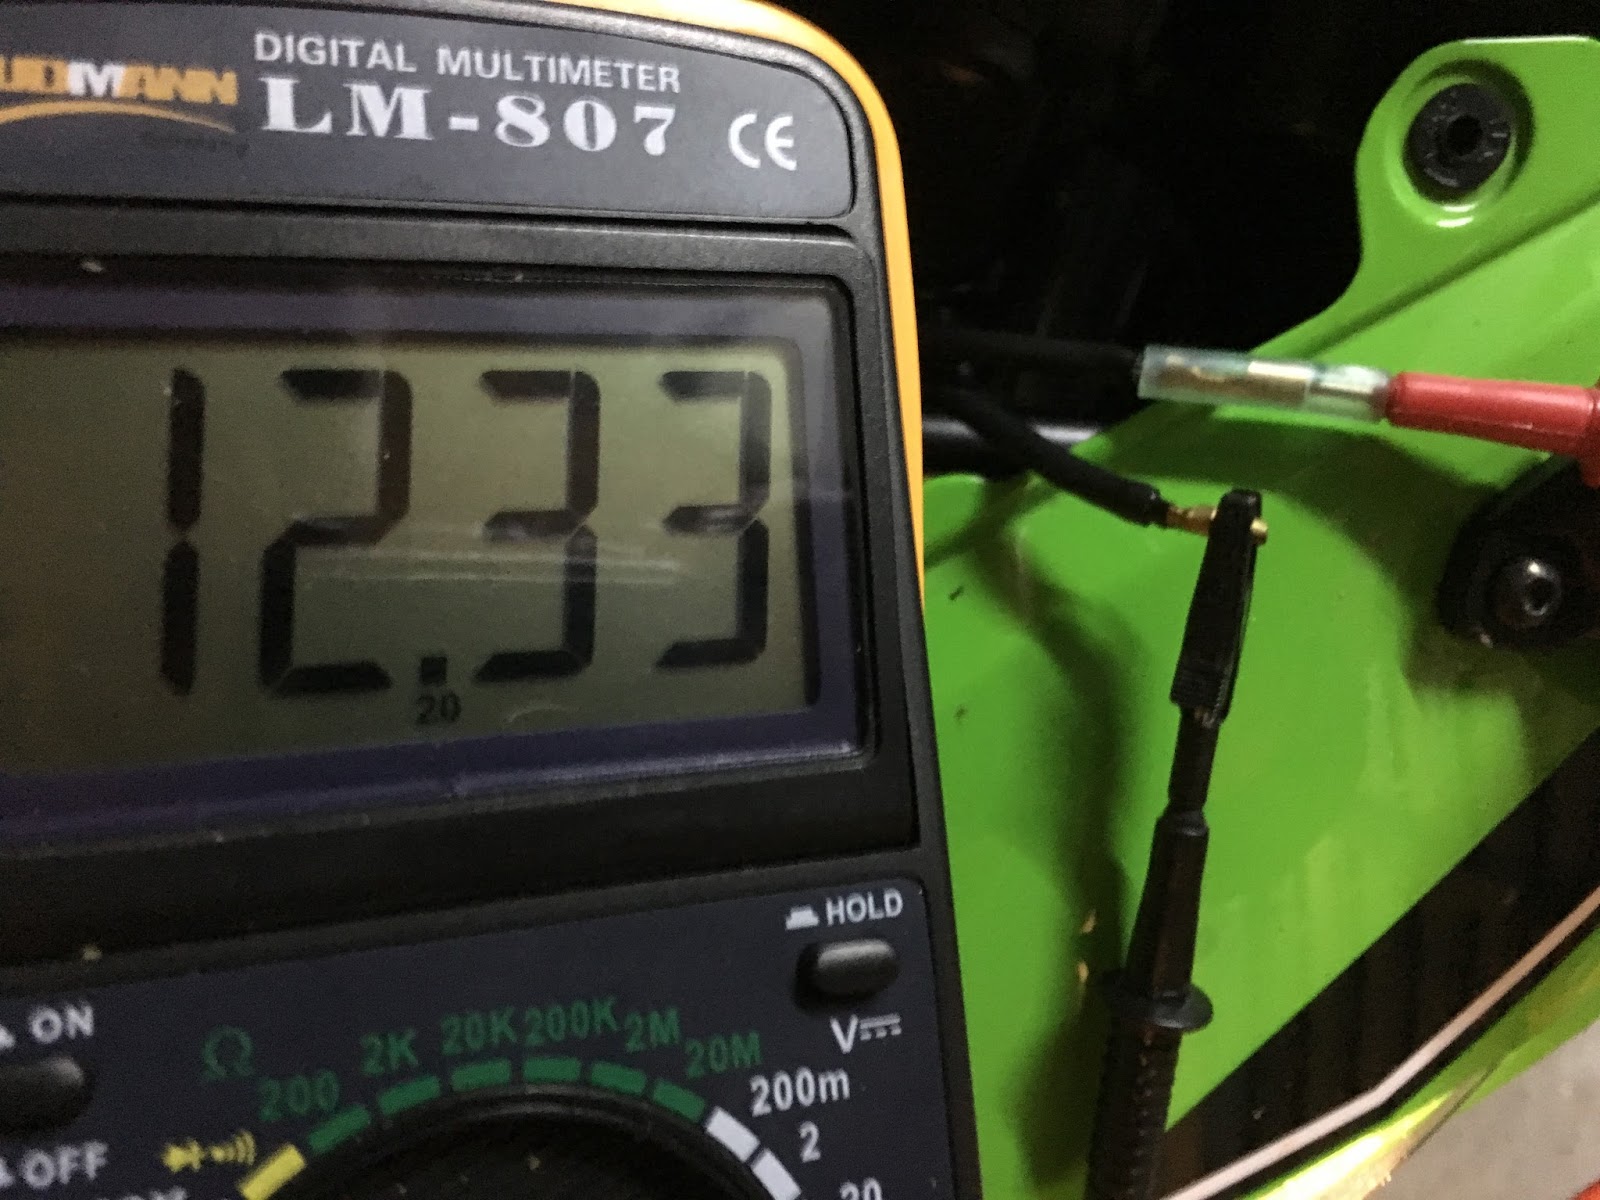
Motorcycle owner's manual says that this cables are already fused.
Step 6:
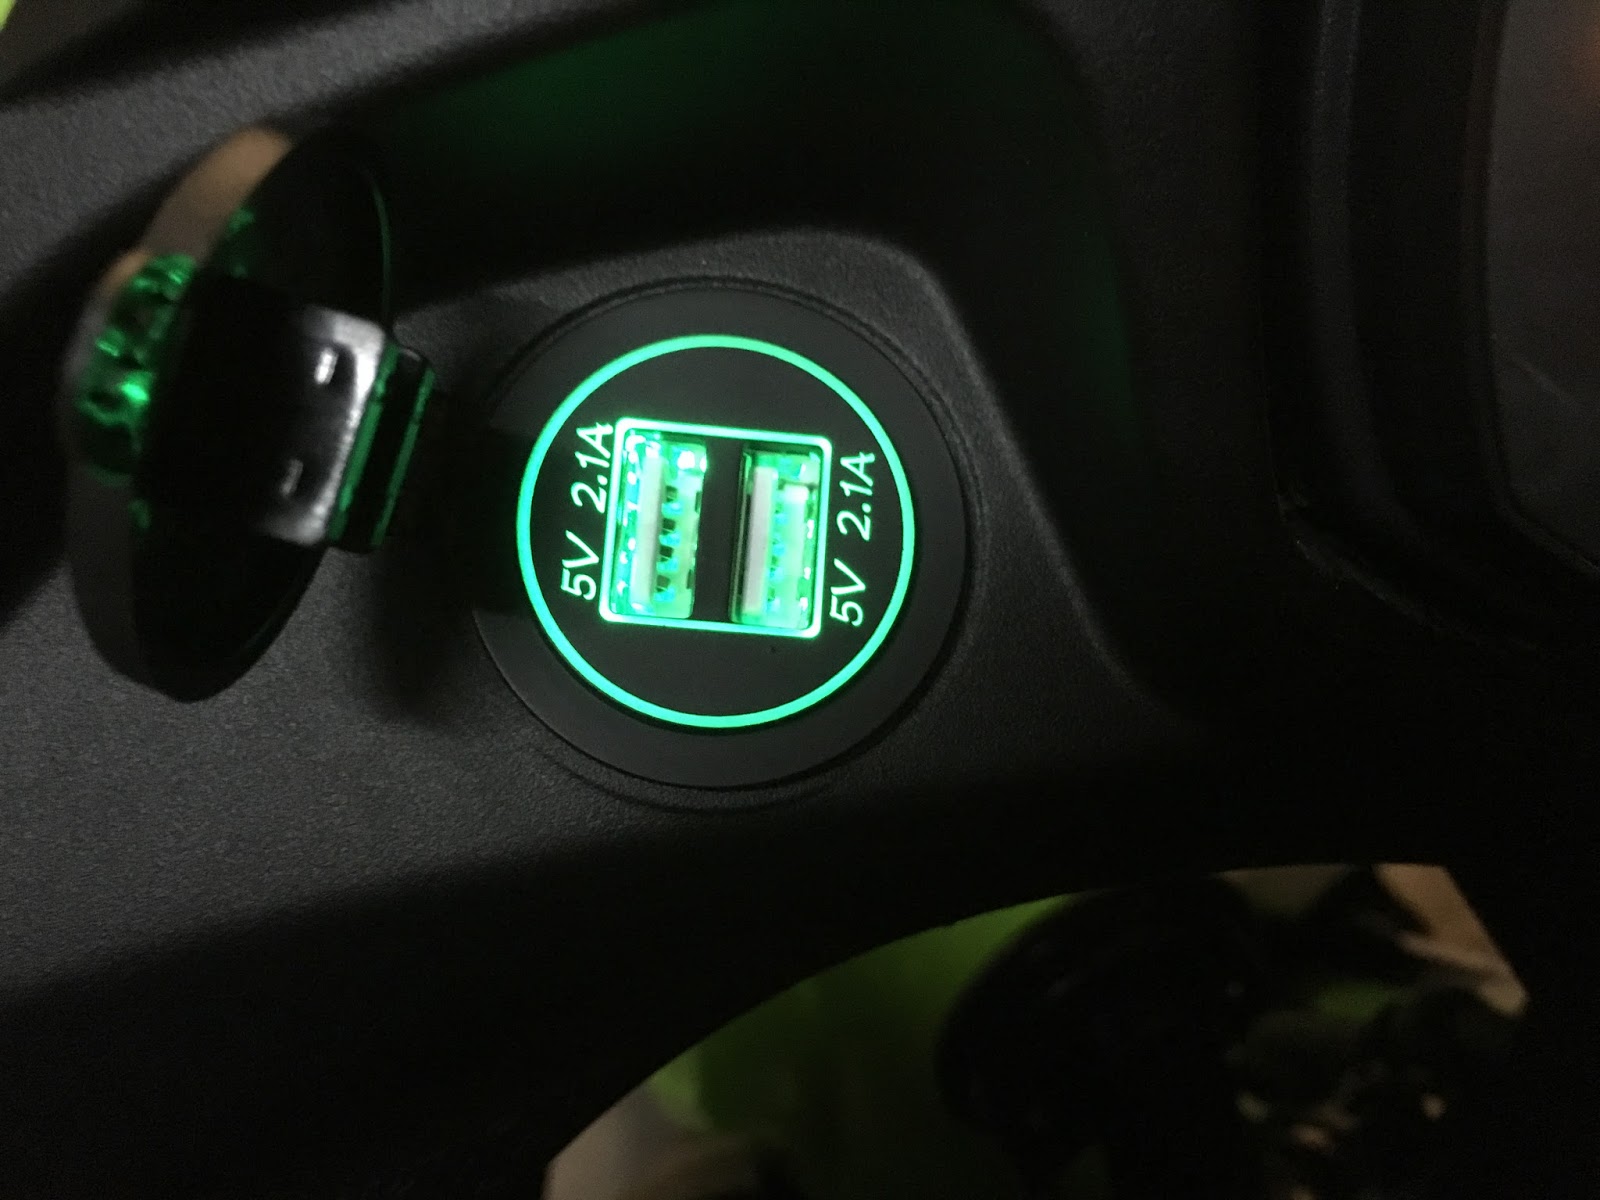
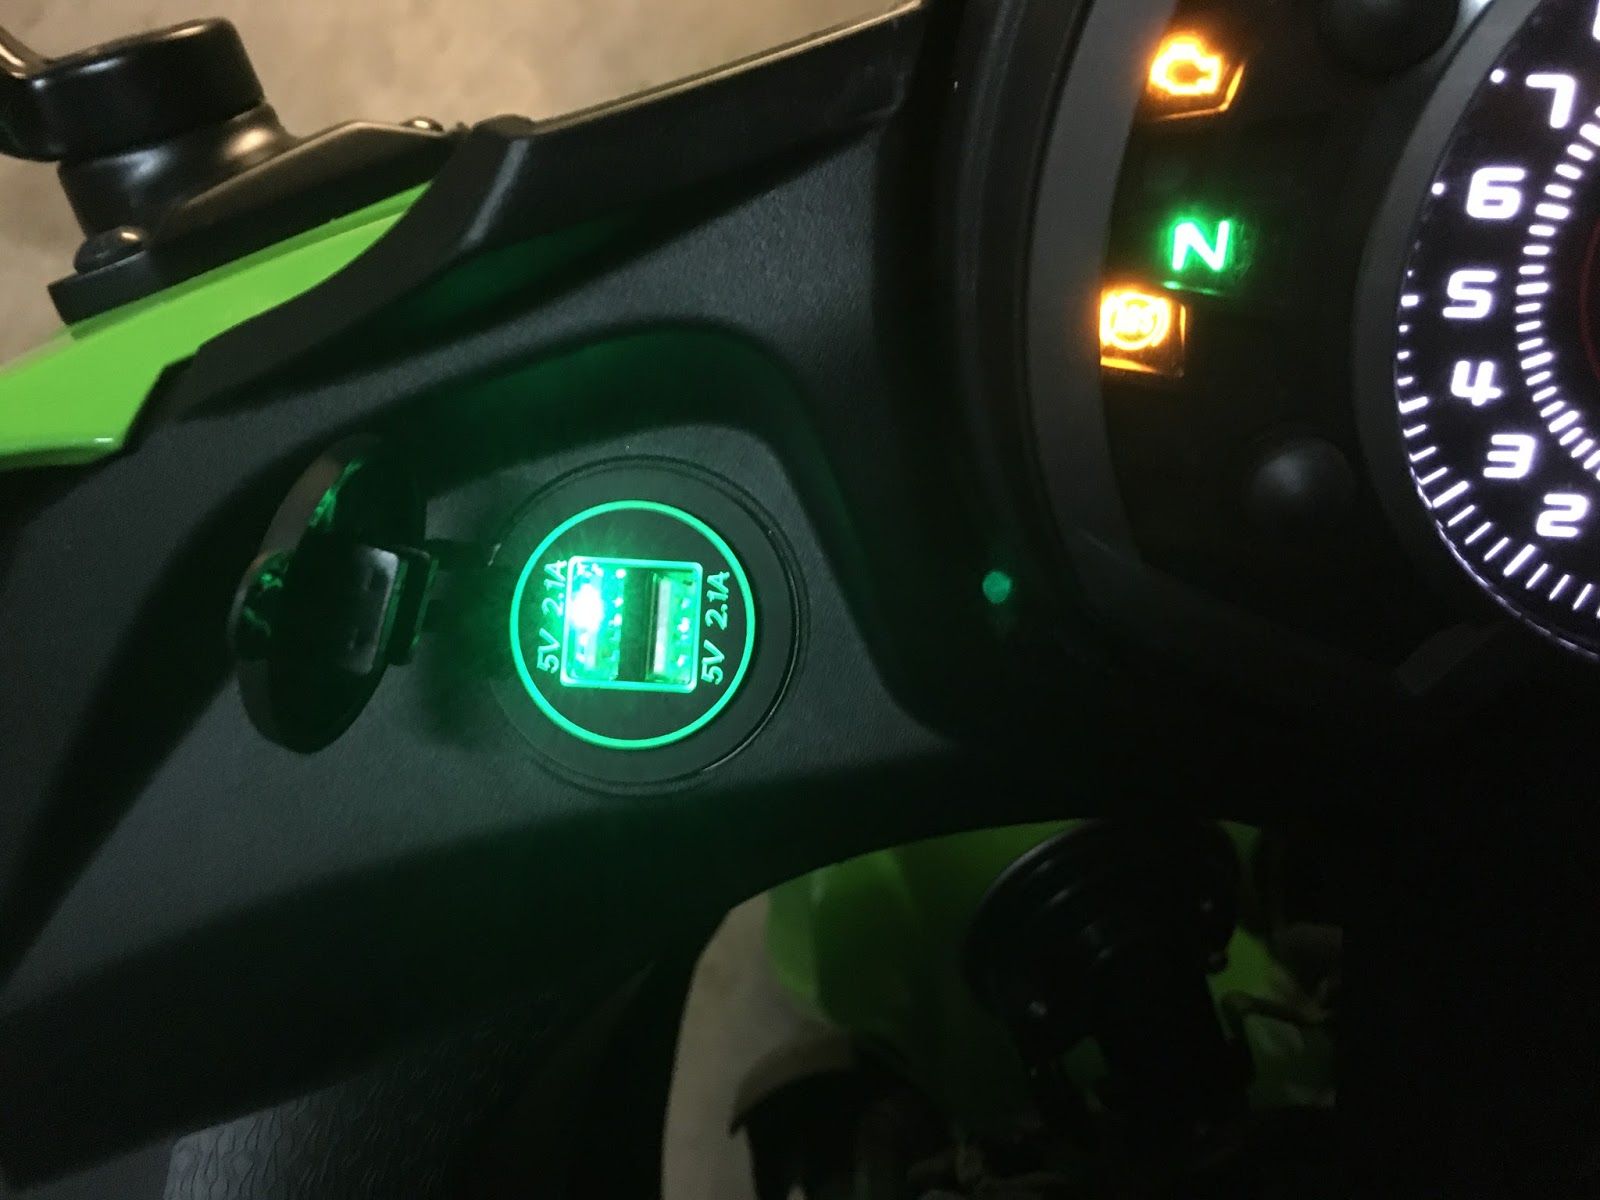
Connect all things together. Keep in mind polarity. Do not mount everything yet, it's always worth to check if it works before taking time to put things back together. Just connect the cables gently and turn the ignition key. My socket is illuminated so first impression was quite good. It's also good idea to verify it USB ports (both!) work correctly. I used my very old phone. Just in case. :)
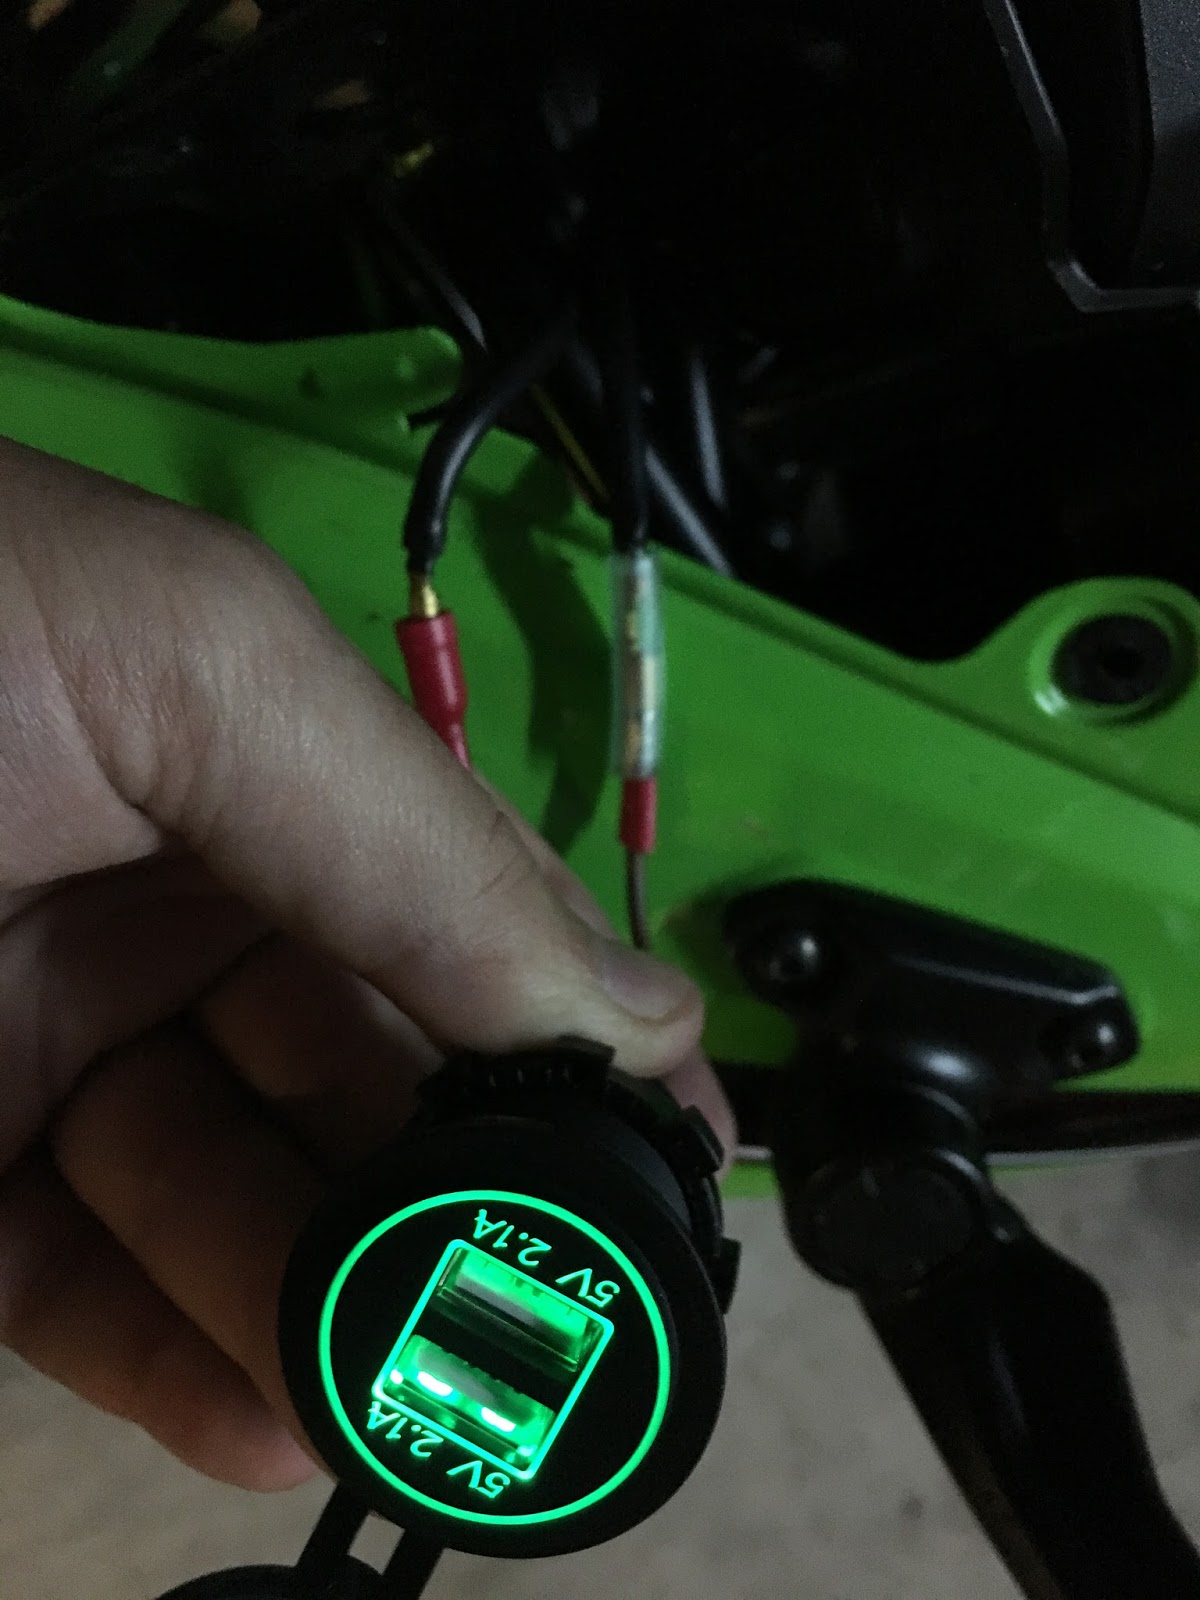
After verification just disconnect the cables, put the socket into the hole (in my case it fits very very tightly so I had to turn it around several times). Secure with fastener ring. Replug the cables keeping in mind polarity, then retest.

If it works it's time to make sure that cables are connected firmly and put back the rest of the bike together. Enjoy your new $5 socket! :-)
This comment has been removed by a blog administrator.
ReplyDelete