Friday, October 27, 2017

DYI: Kawasaki Ninja 650 2017 USB socket for $5

I wanted to install 12V (cigarette lighter) socket into my new Ninja 650 motorbike. I couldn't believe Kawasaki price - almost 130USD (!!!) for the socket itself. Installation fee is counted separately. 

Insane? Definitely. 

Doing it myself, I have installed "native", double USB socket with a bit of patience and less than $5.


I went to my favourite Chinese portal and bought this one for $4.24 including shipping. By the way, I mentioned patience before, cause it takes a bit to ship from China.


Installation is almost as easy as connecting the cables. They are already prepared and routed, but let's start from the beginning.

Step 1:
Remove 12V Socket plug from the dashboard. It's secured by one screw from the bottom so it's a bit inconvenient, but with medium screwdriver it can be done without removing any other part of bike:


Step 2:
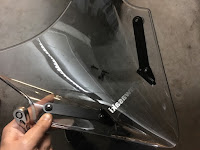
Remove windscreen. In my case it was easier then usual because I already moved it to middle position. I managed to remove it together with mounting rails:


Step 3:
Remove front black panel by pushing center of 4 clips and removing two screws:


Step 4:
Now the front of your motorcycle should look like this:


Look inside nearby socket hole and find two cables:


Step 5:
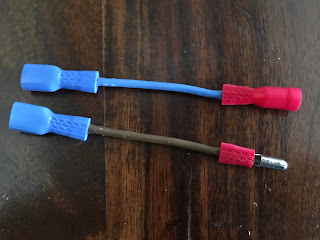
The most difficult part, prepare adapter cables. Required in my case because my usb socket has  flat connectors. There were 2 flat connectors already included with my Socket, I had to buy two round (4mm) connectors for less then $0.10 total - you can find them in nearby electric store. 5cm of cable which I already had, stripped from isolation on both ends, squeezed as hard as I could into connectors:


Almost ready to connect, one more thing - polarity is important, connecting improperly may cause damage. Verified with multimeter, female connector is positive (+) and male connector is ground (-)


Motorcycle owner's manual says that this cables are already fused.

Step 6:
Connect all things together. Keep in mind polarity. Do not mount everything yet, it's always worth to check if it works before taking time to put things back together. Just connect the cables gently and turn the ignition key. My socket is illuminated so first impression was quite good. It's also good idea to verify it USB ports (both!) work correctly. I used my very old phone. Just in case. :)


After verification just disconnect the cables, put the socket into the hole (in my case it fits very very tightly so I had to turn it around several times). Secure with fastener ring. Replug the cables keeping in mind polarity, then retest.


If it works it's time to make sure that cables are connected firmly and put back the rest of the bike together. Enjoy your new $5 socket! :-)
Wednesday, October 11, 2017

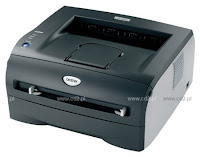
Brother HL-2032 and osx - wireless printing (Linux)

Yep, still have this good old printer and it doesn't want to break. Quality is already bad but I'm not printing wedding invitations. Paper feed tends to get stuck every now and then. But I buy toner powder and refill it manually so it's extremely, extremely cheap. With that being said, I'm not really motivated to change. Anyways, when printing remotely from OSX or any other apple device, the best I was getting was just a ton of blank pages, the only way to stop this was actually to unplug power from the printer. So when I needed to print something I just had to walk to the printer, plug to USB and print directly. Not so bad, you have to get yourself to the printer to pick up your printouts anyway. Nothing else worked, including drivers from Brother or CUPS-supplied drivers. But recently I've finally managed to make it work - it was just a matter of spending some time trying different combinations of drivers and settings.

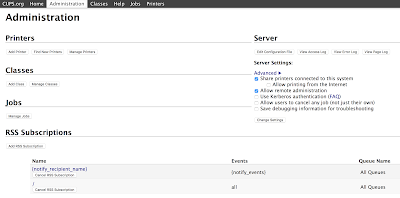
When I bought by raspberry I thought that maybe, just maybe I'll go ahead and try once again before I scrap it and buy something equipped with duplex, scanner, ADF and other fancy features. I've gone ahead and installed CUPS (apt install cups). Enabled remote configuration access - you need to edit /etc/cups/cupsd.conf and add there whatever is marked red:

# Only listen for connections from the local machine.
#Listen localhost:631
Port 631

# Restrict access to the server...
<Location />
  Order allow,deny
  Allow @local
</Location>

# Restrict access to the admin pages...
<Location /admin>
  Order allow,deny
  Allow @local
</Location>

# Restrict access to configuration files...
<Location /admin/conf>
  AuthType Default
  Require user @SYSTEM
  Order allow,deny
  Allow @local
</Location>


Reload CUPS (/etc/init.d/cups restart) and you should be able to go to http://your-cups-box:631/ and see CUPS configuration page.


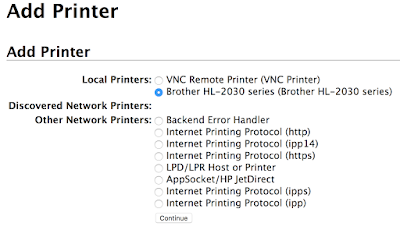
Okay, looks like the hardest part is done. Now click on "Add Printer", then select your Brother HL-2032 printer and click "Continue".


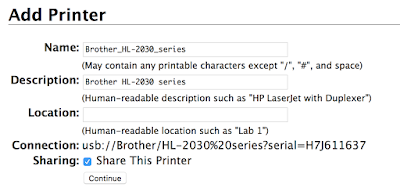
Select whatever name/description/location you feel comfortable for your printer (and of course Share) and move forward...


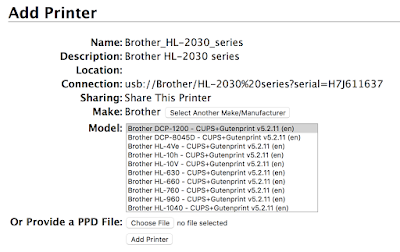
And now the tricky part - drivers:


Go to http://www.openprinting.org/printer/Brother/Brother-HL-2030 and download HL-2030 drivers PPD file (use "Directly download PPD" link)


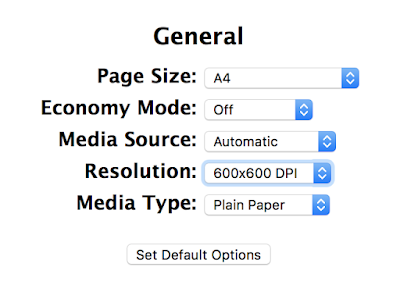
Now get back to CUPS page and select "Or provide a PPD file:" and choose downloaded file (Brother-HL-2030-hl1250.ppd). Next page will ask you a couple of questions about settings:

Now you are good to go. Try to print a test page, should work like a charm.